To install an HTML email signature in Gmail, you can follow these steps:
Step 1: Create your HTML email signature:
First, you need to create your HTML email signature using an HTML editor or You can create from here.You can include elements such as your name, job title, contact information, logo, and any other design elements you want.
Step 2: select and copy the Signature:
Once your HTML email signature is ready, Open the html file on your browser then select and copy the entire Signature.
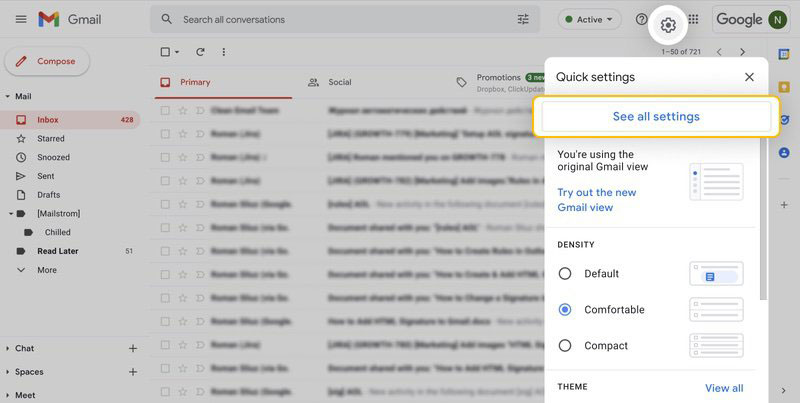
Step 3: Access Gmail settings:
Open Gmail in your web browser and log in to your account. Click on the gear icon in the top right corner to access the settings menu. From the dropdown menu, select “Settings.”
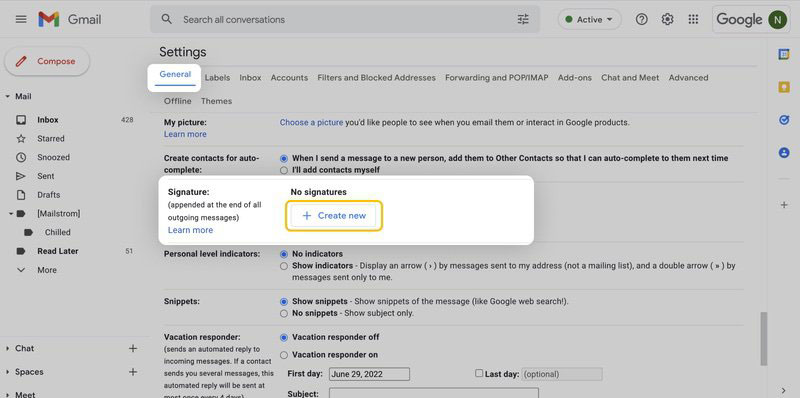
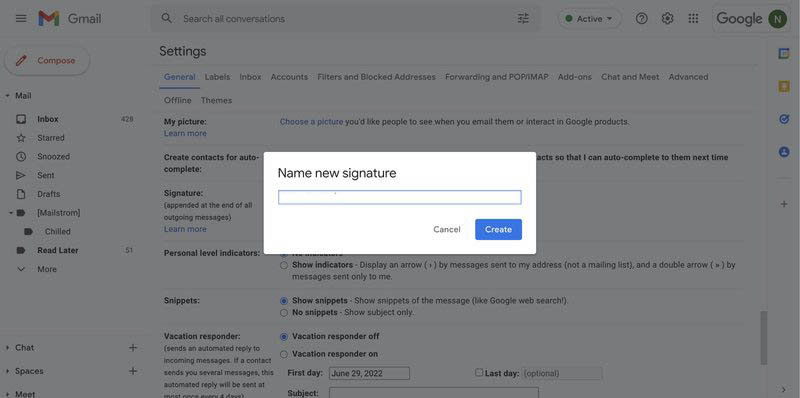
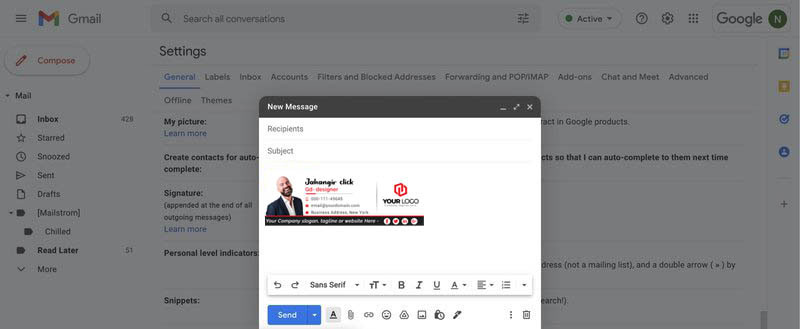
Step 4: Go to the Signature section:
In the Gmail settings, scroll down until you find the “Signature” section. Here, you can set up your email signature.
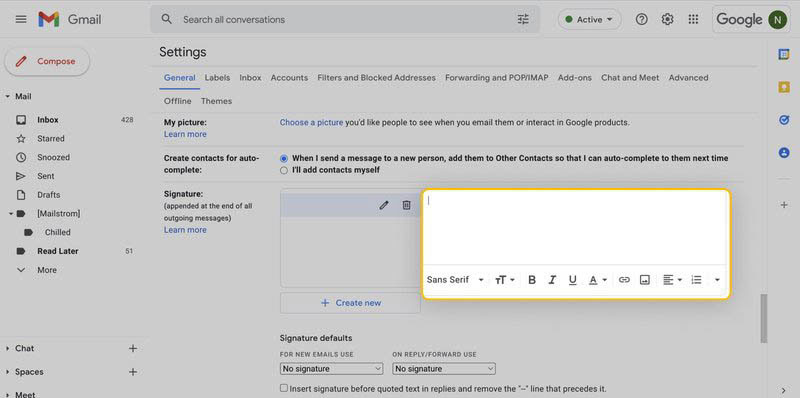
Step 5: Paste the Signature:
In the signature editor, make sure the “No signature” option is selected. Then, paste the Signature you copied earlier into the signature editor box.
Step 6: Save changes:
After pasting the Signature, scroll down to the bottom of the settings page and click on the “Save Changes” button. Gmail will now apply your HTML email signature to all outgoing emails.
Step 7: Test your signature:
Compose a new email to yourself or someone else to test your email signature. Make sure all the elements and formatting appear correctly. If necessary, go back to the settings and make adjustments to your HTML code to fix any issues.
That’s it! You have successfully installed your HTML email signature in Gmail. Your signature will now be automatically added to all your outgoing emails.